
How to Add Your Website To OutreachMantra
When it comes to monetizing a blog, a newbie blogger will only choose Adsense or Amazon affiliate, while a seasoned blogger knows there are many other options than those traditional ones.
Guest posting, or sponsored posting, is another effective source of generating passive income by simply accepting sponsored posts on your blog.
That sounds great, but how will advertisers who want to grow their search visibility, find you?
The answer is simple, OutreachMantra.
Yes, that’s the reason you are reading this article, isn’t it? Maybe a blogger friend of yours recommended our platform or maybe you came all the way from a google search.
At OutreachMantra, we help webmasters like you, and advertisers connect, which is a win-win situation for both of you. But before this happens, you should add your website to our platform, and let the advertisers from all over the world, find your website(s).
And to do that, I’ll help you out. Just follow the steps below and you are good to go.
Contents
Create An Account
The first step is to create an account. Since you are a publisher, click on “create an account” and select publisher during the process.

If you have mistakenly selected an advertiser, don’t panic, you can easily toggle between advertiser/publisher from the dashboard.
Adding Website(s)
The next step is to add your website. You can add more than one website, there’s no limit as such, we welcome webmasters who wish to monetize their sites through our platform.
On the left sidebar, click on the “my websites” option.
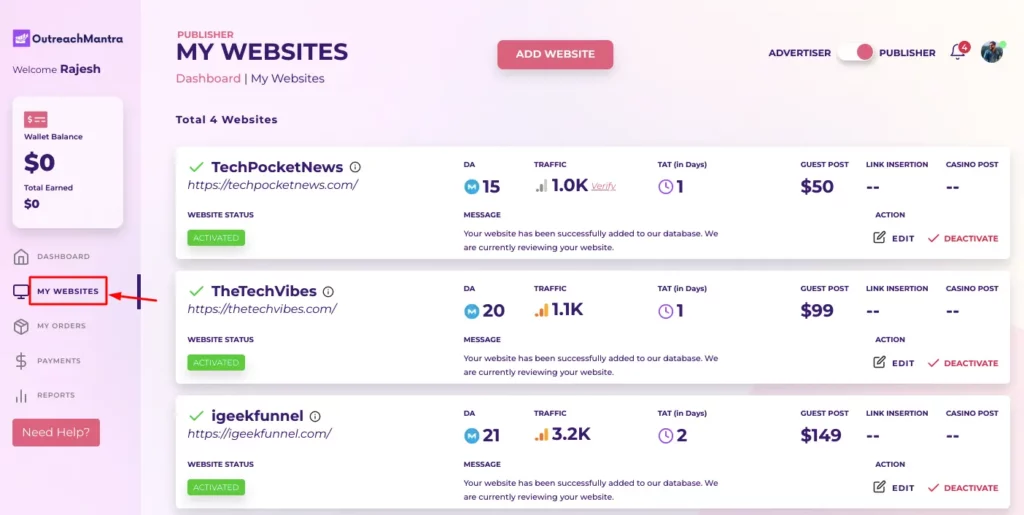
Now click on the “Add website” button, and enter your site’s URL in the field.
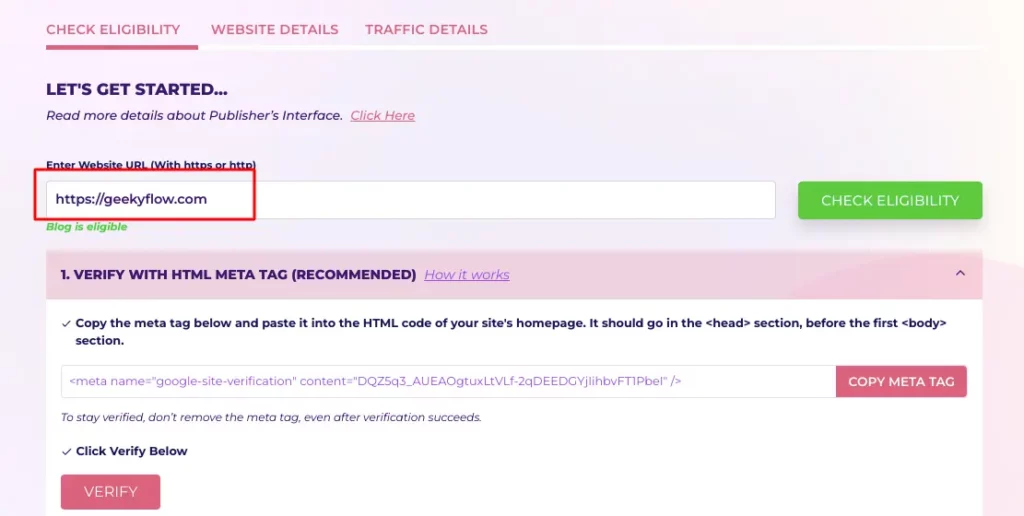
You need to approve Google consent before we add your website to our database.
Google consent form is required because it prevents third-party resellers from adding the website to OutreachMantra’s database without the permission of the owner.
This helps us to identify the true owner of the web property. Your personal data, and privacy, are neither collected nor compromised while accepting the consent form. Learn more here: https://developers.google.com/site-verification
Once that’s done, you will have to verify your site using any of the three available methods, Meta Tag, HTML file and DNS record.
You can find a detailed tutorial for verifying ownership of your blog from here.
Note: If you are not comfortable giving access to your Google account, we have an alternative option to verify the domain ownership. Please send an email to admin@outreachmantra.com for help.
Adding site details
Website name: Your site’s name.
Pricing: Check against the type of linking you accept. Add pricing against each type (see image below).
Sample URL: Have you accepted sponsored posts on your blog before? If yes, add that post’s URL in this field, or leave it blank.
TAT: Turn around time. This means how much time you will take to process the order. Remember: advertisers always want the orders to be processed as quickly as possible.
Post guideline: Any important guidelines that should be followed? Just list them in this section. Tip: use tags beneath the field, to quickly add generic guidelines.
Contact details: These two fields are optional.
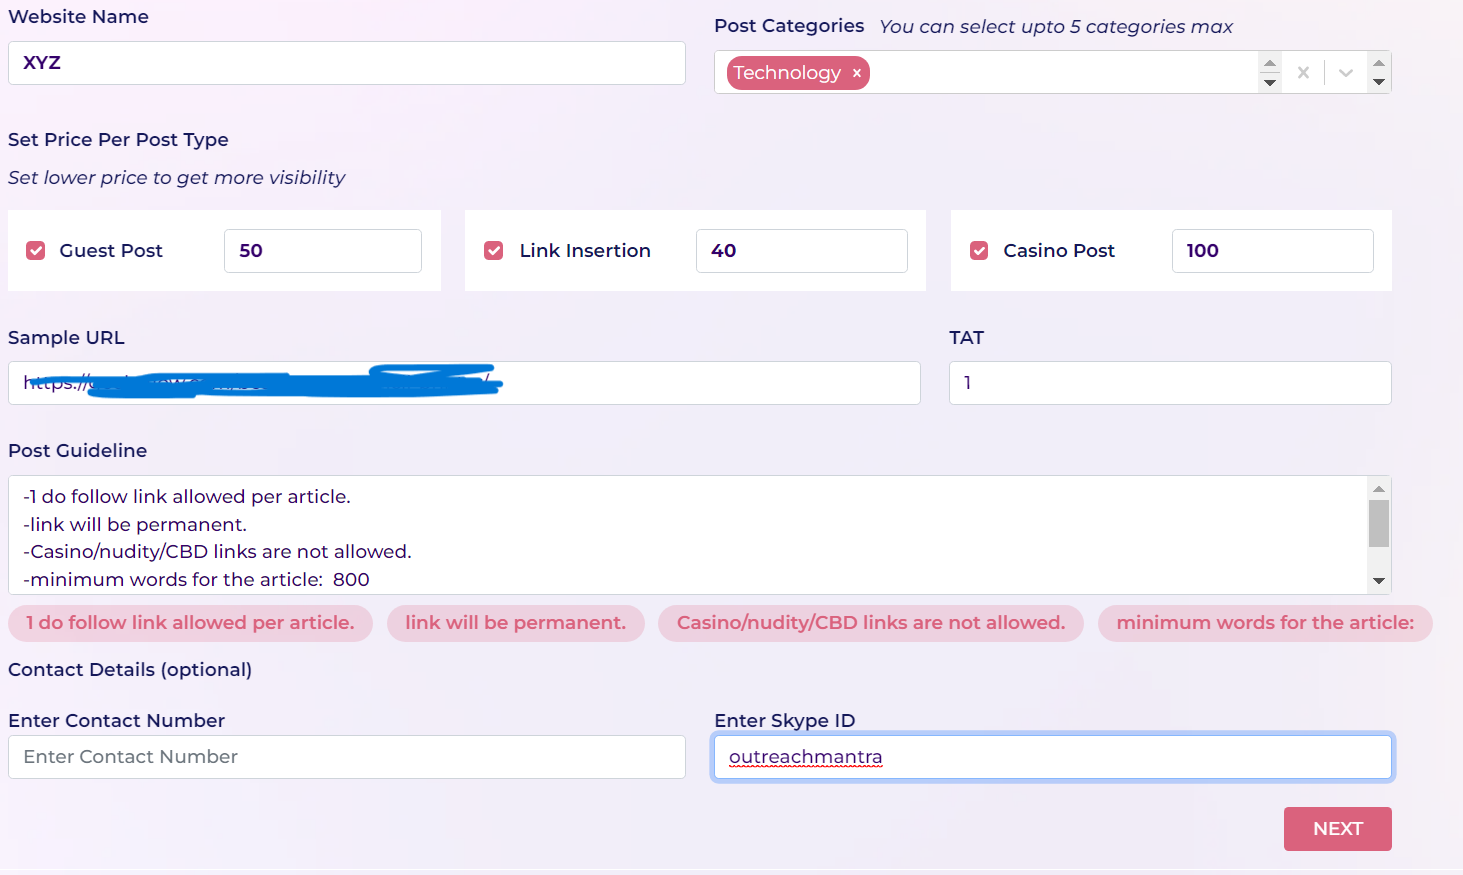
Now click on next.
Note: You will be able to change the price per post or category at any point of time if your blog gets approved on OutreachMantra.
Adding Traffic Details
The last step is to add traffic details. You can either enter it manually or through GA validation.
Note: GA validation is the best way to display traffic to advertisers, since it keeps updating from time to time, we recommend using the GA validation method only.
Here’s a detailed tutorial on how you can verify your GA on OutreachMantra.
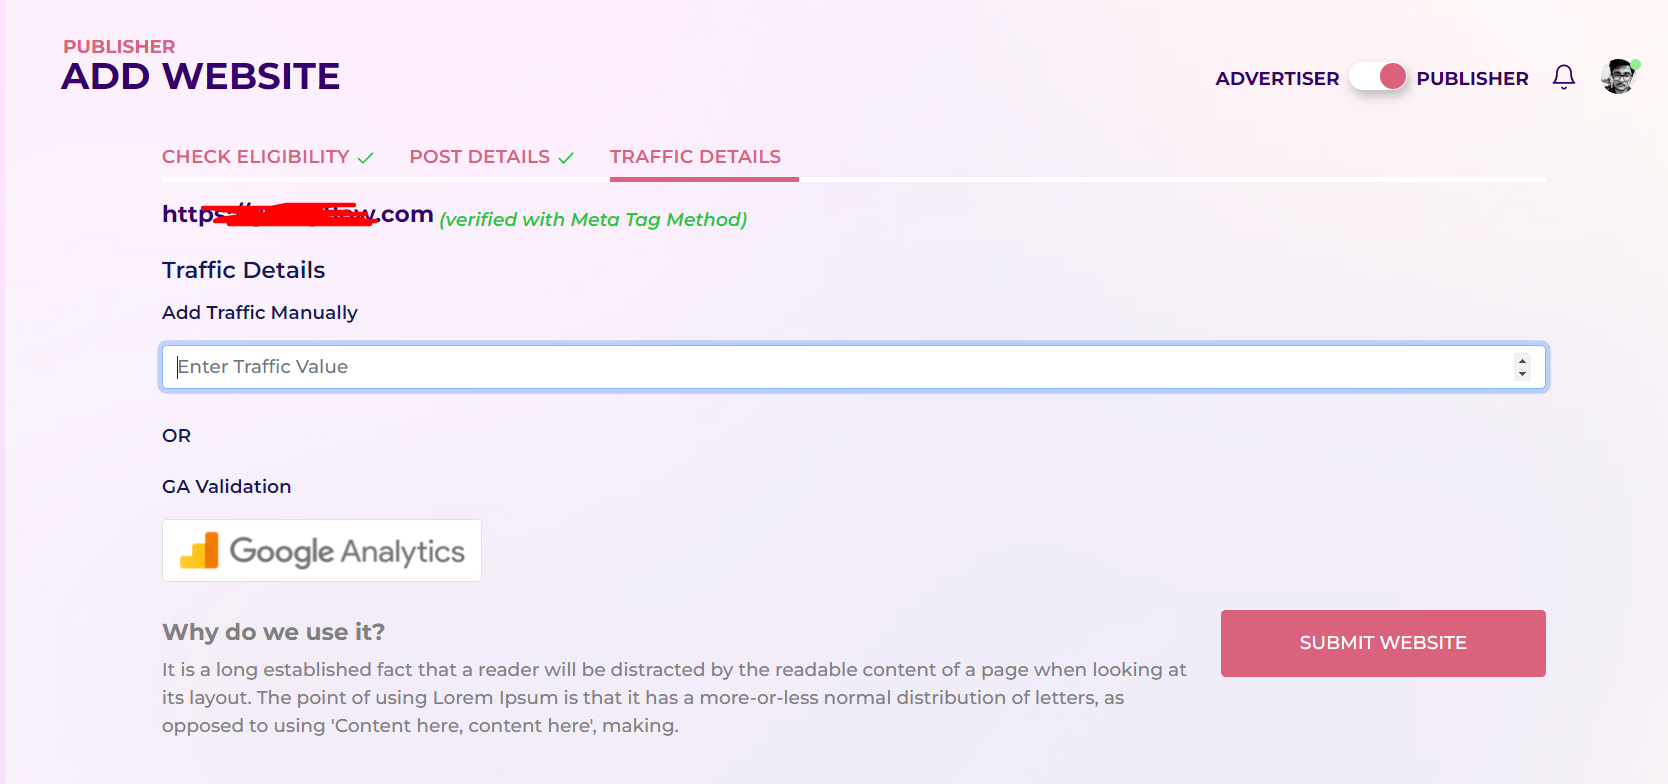
Once done, click on submit website.
Our in-house team vets every single blog submission on OutreachMantra and it typically takes 48-72 hours to analyze your blog before we approve/reject it.
If you face any difficulties while submitting your blog to OutreachMantra, or have any questions/doubts please write us at admin@outreachmantra.com and we will get back to you ASAP.
Criteria for Getting Site approval on OutreachMantra
There are several factors we consider while approving your site.
Your site’s domain authority must be 10+ to be eligible for OutreachMantra. Furthermore, there must be a basic, and advanced level of link building done on your website. Websites with spammy link profiles will be instantly rejected.
2. Traffic and sources
The minimum traffic requirement is 1000 users per month. This traffic should be 50% organic. Sites with an only referral or social traffic will not be accepted.
3. Fair pricing
Please understand that you cannot ask for any XYZ amount for a sponsored post. Make sure your pricing is according to industry standards so that it is affordable for the advertiser. If your site’s DA is 20 with only 5,000 or less traffic per month, make sure the pricing is according to that.
4. PBNs
Our experts can easily distinguish between a PBN and a real blog. Please refrain from submitting PBNs, you can only submit a genuine blog.