How to Verify Ownership of Your Blog?
It is mandatory for all publishers on OutreachMantra to verify ownership of their blogs.
Currently, we are allowing these 3 verification methods which can easily be done by any publisher.
Contents
1. Verify with HTML Meta Tag (Recommended)
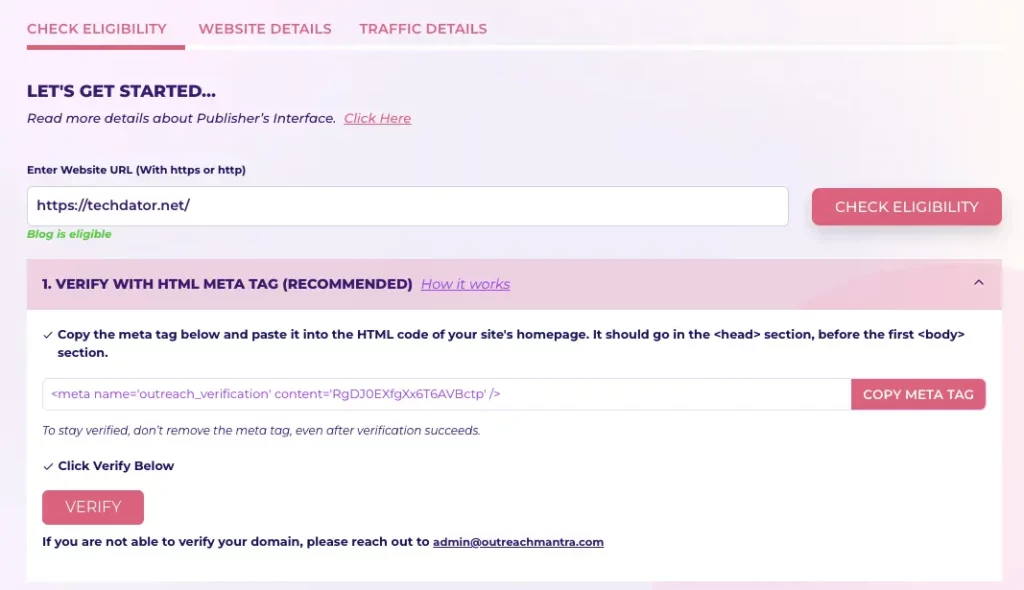
I recommend using the meta tag method because it is fast and easy.
So copy your unique meta code and go to your site’s dashboard.
Install the “Header footer code management” plugin or use any other plugin to add the meta code in the header section.
Once the plugin is installed go to settings and click on Insert Headers and Footers and add provided meta tag.
💡Don’t edit the theme file directly, because if you change the theme in the future, the code will be erased, and you will have to re-do the entire process.
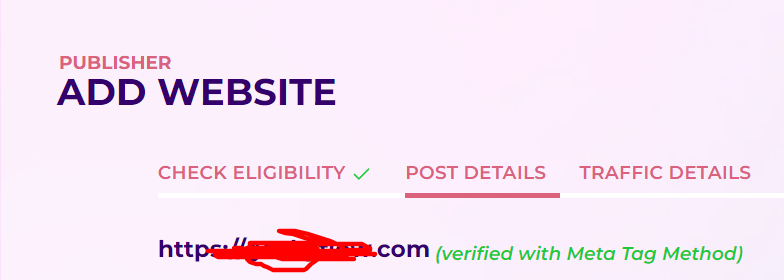
You will see the verification status against your site’s URL.
Congratulations, let’s move forward and add details about this site.
2. Verifying Using DNS Method
Many times, meta tag verification can delay due to caching issues, and if you cannot wait for so long, use the DNS method.
In this method, we will have to create a new TXT record and add it to the domain’s DNS records. This is quite simple, let me show you.
Step 1. Log in to your domain hosting such as Namecheap, Godaddy, or Cloudflare.
Step 2. Copy the DNS value and head over to your domain hosting account.
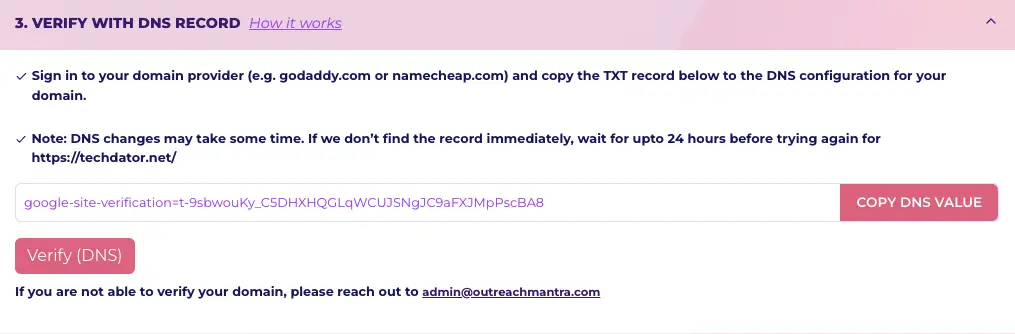
Step 3: Click on Add record, and select TXT type.
In the name field, enter @, TTL should be set as auto, and in the content field, paste the DNS value. Now hit save and go back to the verification page on OutreachMantra.
Step 4: Click on verify DNS, and your site will now get verified.
3. Site Verification With HTML File
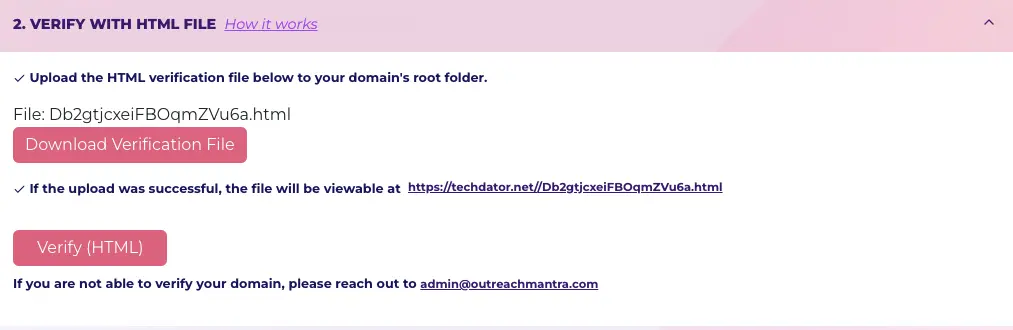
This method requires you to open your web hosting’s file manager and upload the HTML file to the root directory.
Please download the HTML file first, and now open your site’s directory. If you are using an unmanaged cloud server, open the site’s directory using FTP login, or temporarily install a file manager plugin on your WordPress site.
1. Open the root directory, if there are multiple sites hosted on the same server, select the directory of the site that you want to verify.
2. Open the subfolder, (domain.com), it should look something like this (image below). 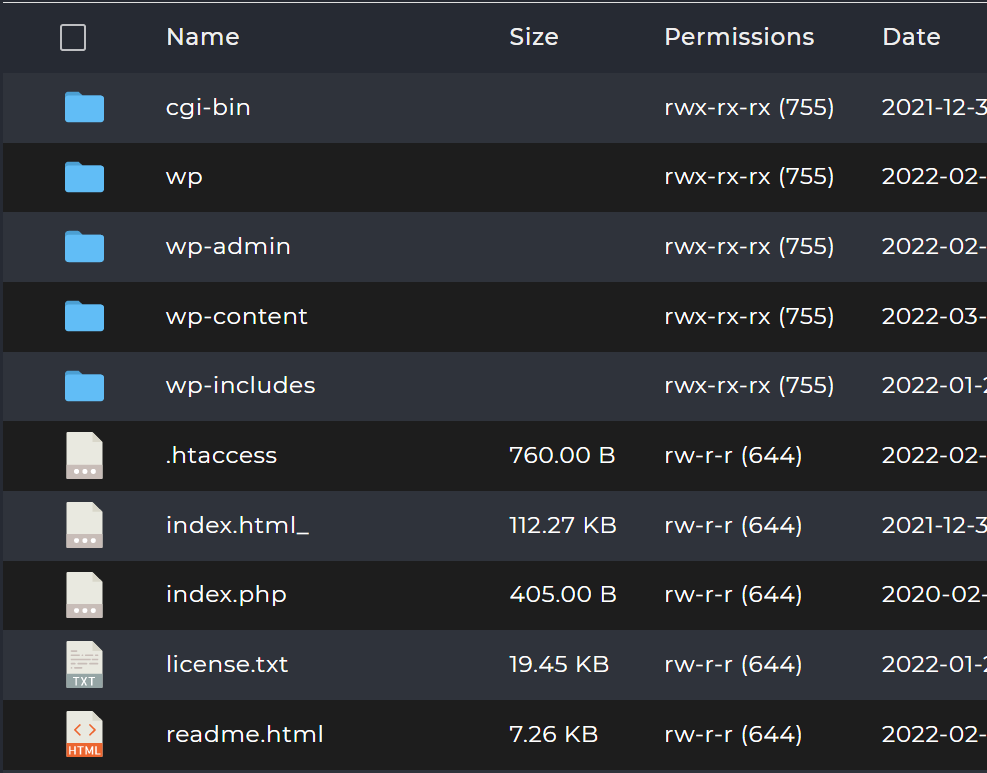
3. You don’t have to create any subfolder, just upload the file in the root directory using the upload option.
4. Now come back to the verification page and click on verify HTML button.
5. That’s how you can verify using the HTML file method.
If you are facing difficulties while submitting your blog to OutreachMantra, or if you have any questions/doubts – feel free to chat with us via the chat widget at the bottom right of the screen or write us at admin@outreachmantra.com.
We look forward to hearing from you.